Prototype setup done!
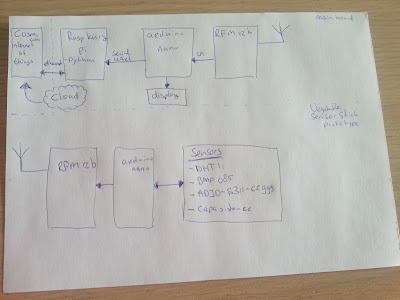
These are the sensors that I've been experimenting with on my breadboard:
- Air humidity and temperature
- DHT11
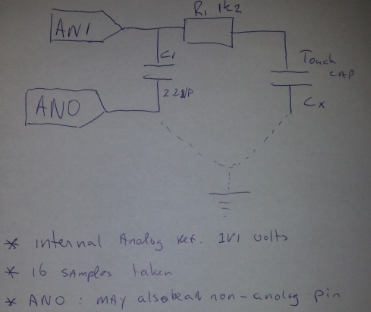
- Soil moisture using capacitance measurements
- Internal uC
- Barometer
- BMP085
- Color and amount of Light
- ADJD-S311-CR999
I've successfully gathered a week of data to the online graphing service of Cosm (internet of things / Cloud service).
You can see the day/night rhythm, and since we are still in the winter here in Netherlands, there isn't much bright daylight. Also the humidity indicator shows when I mounted the clear plastic cap over my vegetables, it caused a rapid increase of the humidity.
Please note that in the image above, the SoilMoisure, SoilTemperature and CO2 was still under development. That's why there is no (complete) line. See the complete, real-time data here https://cosm.com/feeds/119538.
Now it is time to move the prototype to the next level. I want to make a PCB out of it. Since I've currently got 10 places I want to monitor, I want to keep the costs for each unit low but very flexible/universal.
I am thinking about
The very basic version of the PCB should have at least the Soil moisture measurements for less than 15 euro. Lets see if I can keep that thought. Also thinking of a good name for the project, hmmm.. Vegetable SensorStick ? EEO SensorStick? Well.. that is for later. First make the PCB :)
Idea for the DAC output of the soil and humidity outputs
Personal note:
You can see the day/night rhythm, and since we are still in the winter here in Netherlands, there isn't much bright daylight. Also the humidity indicator shows when I mounted the clear plastic cap over my vegetables, it caused a rapid increase of the humidity.
Please note that in the image above, the SoilMoisure, SoilTemperature and CO2 was still under development. That's why there is no (complete) line. See the complete, real-time data here https://cosm.com/feeds/119538.
Making it more serious
Now it is time to move the prototype to the next level. I want to make a PCB out of it. Since I've currently got 10 places I want to monitor, I want to keep the costs for each unit low but very flexible/universal.
I am thinking about
- Battery powered (3xAAA or 1x CR2032 coin cell)
- Soil moisture area directly mounted on the PCB
- All the sensors currently attached to the PCB
- Have a voltage output that represents the value of the soil and humidity
- analog output between [0v...3v] for soil moisure (at least 12bit resolution)
- analog output between [0v...3v] for humidity (at least 8bit resolution)
- Have a serial output pins that broadcast data
- Keep the Arduino bootloader so it will be very easy for others to make changes
- but to save costs, remove the USB to UART.
- Publish source and hardware to google project as open source
- Capacitance button to pair the device to the mainboard
- LDR for light measurement for cheaper versions (PCB will be AND not OR)
The very basic version of the PCB should have at least the Soil moisture measurements for less than 15 euro. Lets see if I can keep that thought. Also thinking of a good name for the project, hmmm.. Vegetable SensorStick ? EEO SensorStick? Well.. that is for later. First make the PCB :)
Idea for the DAC output of the soil and humidity outputs
Today taken pictures of the Propagator
Personal note:
- CO2
- Humidity
- Temp Ambient
- Temp Soil
- Soil moisture
- Barometer
- Light resistor
- Color / light sensor


